Add a Product Feed to Your Facebook Catalog in Commerce Manager (Facebook & Instagram)
To add a product feed to a Facebook catalog in Commerce Manager, you give Meta your feed's URL as a scheduled feed. Meta then fetches that URL again on the schedule you choose. Awesome Feeds (formerly Awesome Facebook Product Feed) turns your Shopify catalog into that URL, in Google-format XML and also gzipped (.xml.gz), and keeps the file updated automatically as your products, prices and stock change. There is no API push and no account to connect: Meta reads the URL on its own schedule. This guide covers the main feed of a catalog, the one every new store needs. The same catalog serves your Facebook and Instagram shopping and ads.
Don't have Awesome Feeds yet? Install it from the Shopify App Store →
1 Create your feed in Awesome Feeds
If you haven't yet, create a feed in the app with the Basic or Advanced editor. You can switch between them at any time without losing settings. Choose all products or only selected collections, and pick a variant export mode. By default every variant is exported, with sold-out ones marked out of stock.
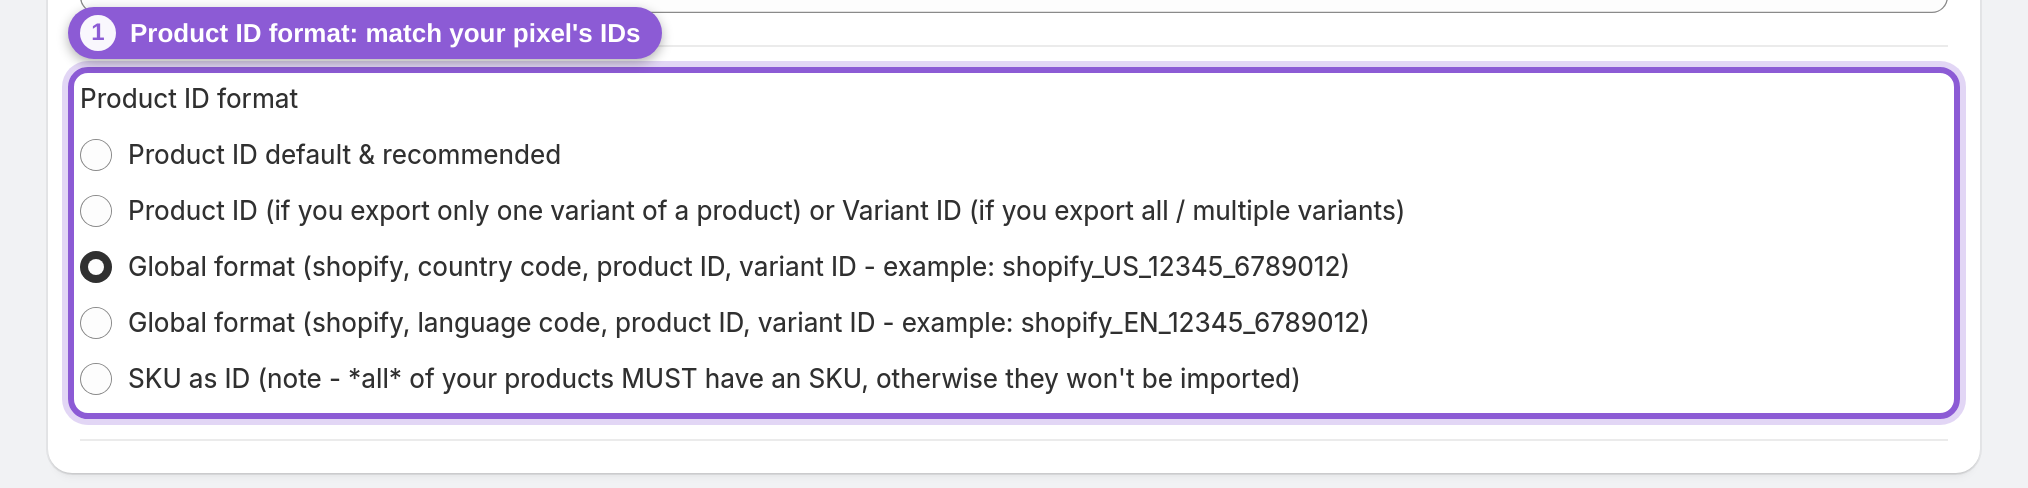
Before you add the feed to Meta, check its Product ID format. The default is the Shopify variant ID. If you track events with a Facebook pixel, the IDs in your feed should match the IDs the pixel sends. See Product IDs and Facebook pixel matching. Changing the format after Meta has imported the catalog changes every item's ID.
2 Wait for the feed to build, then copy its URL
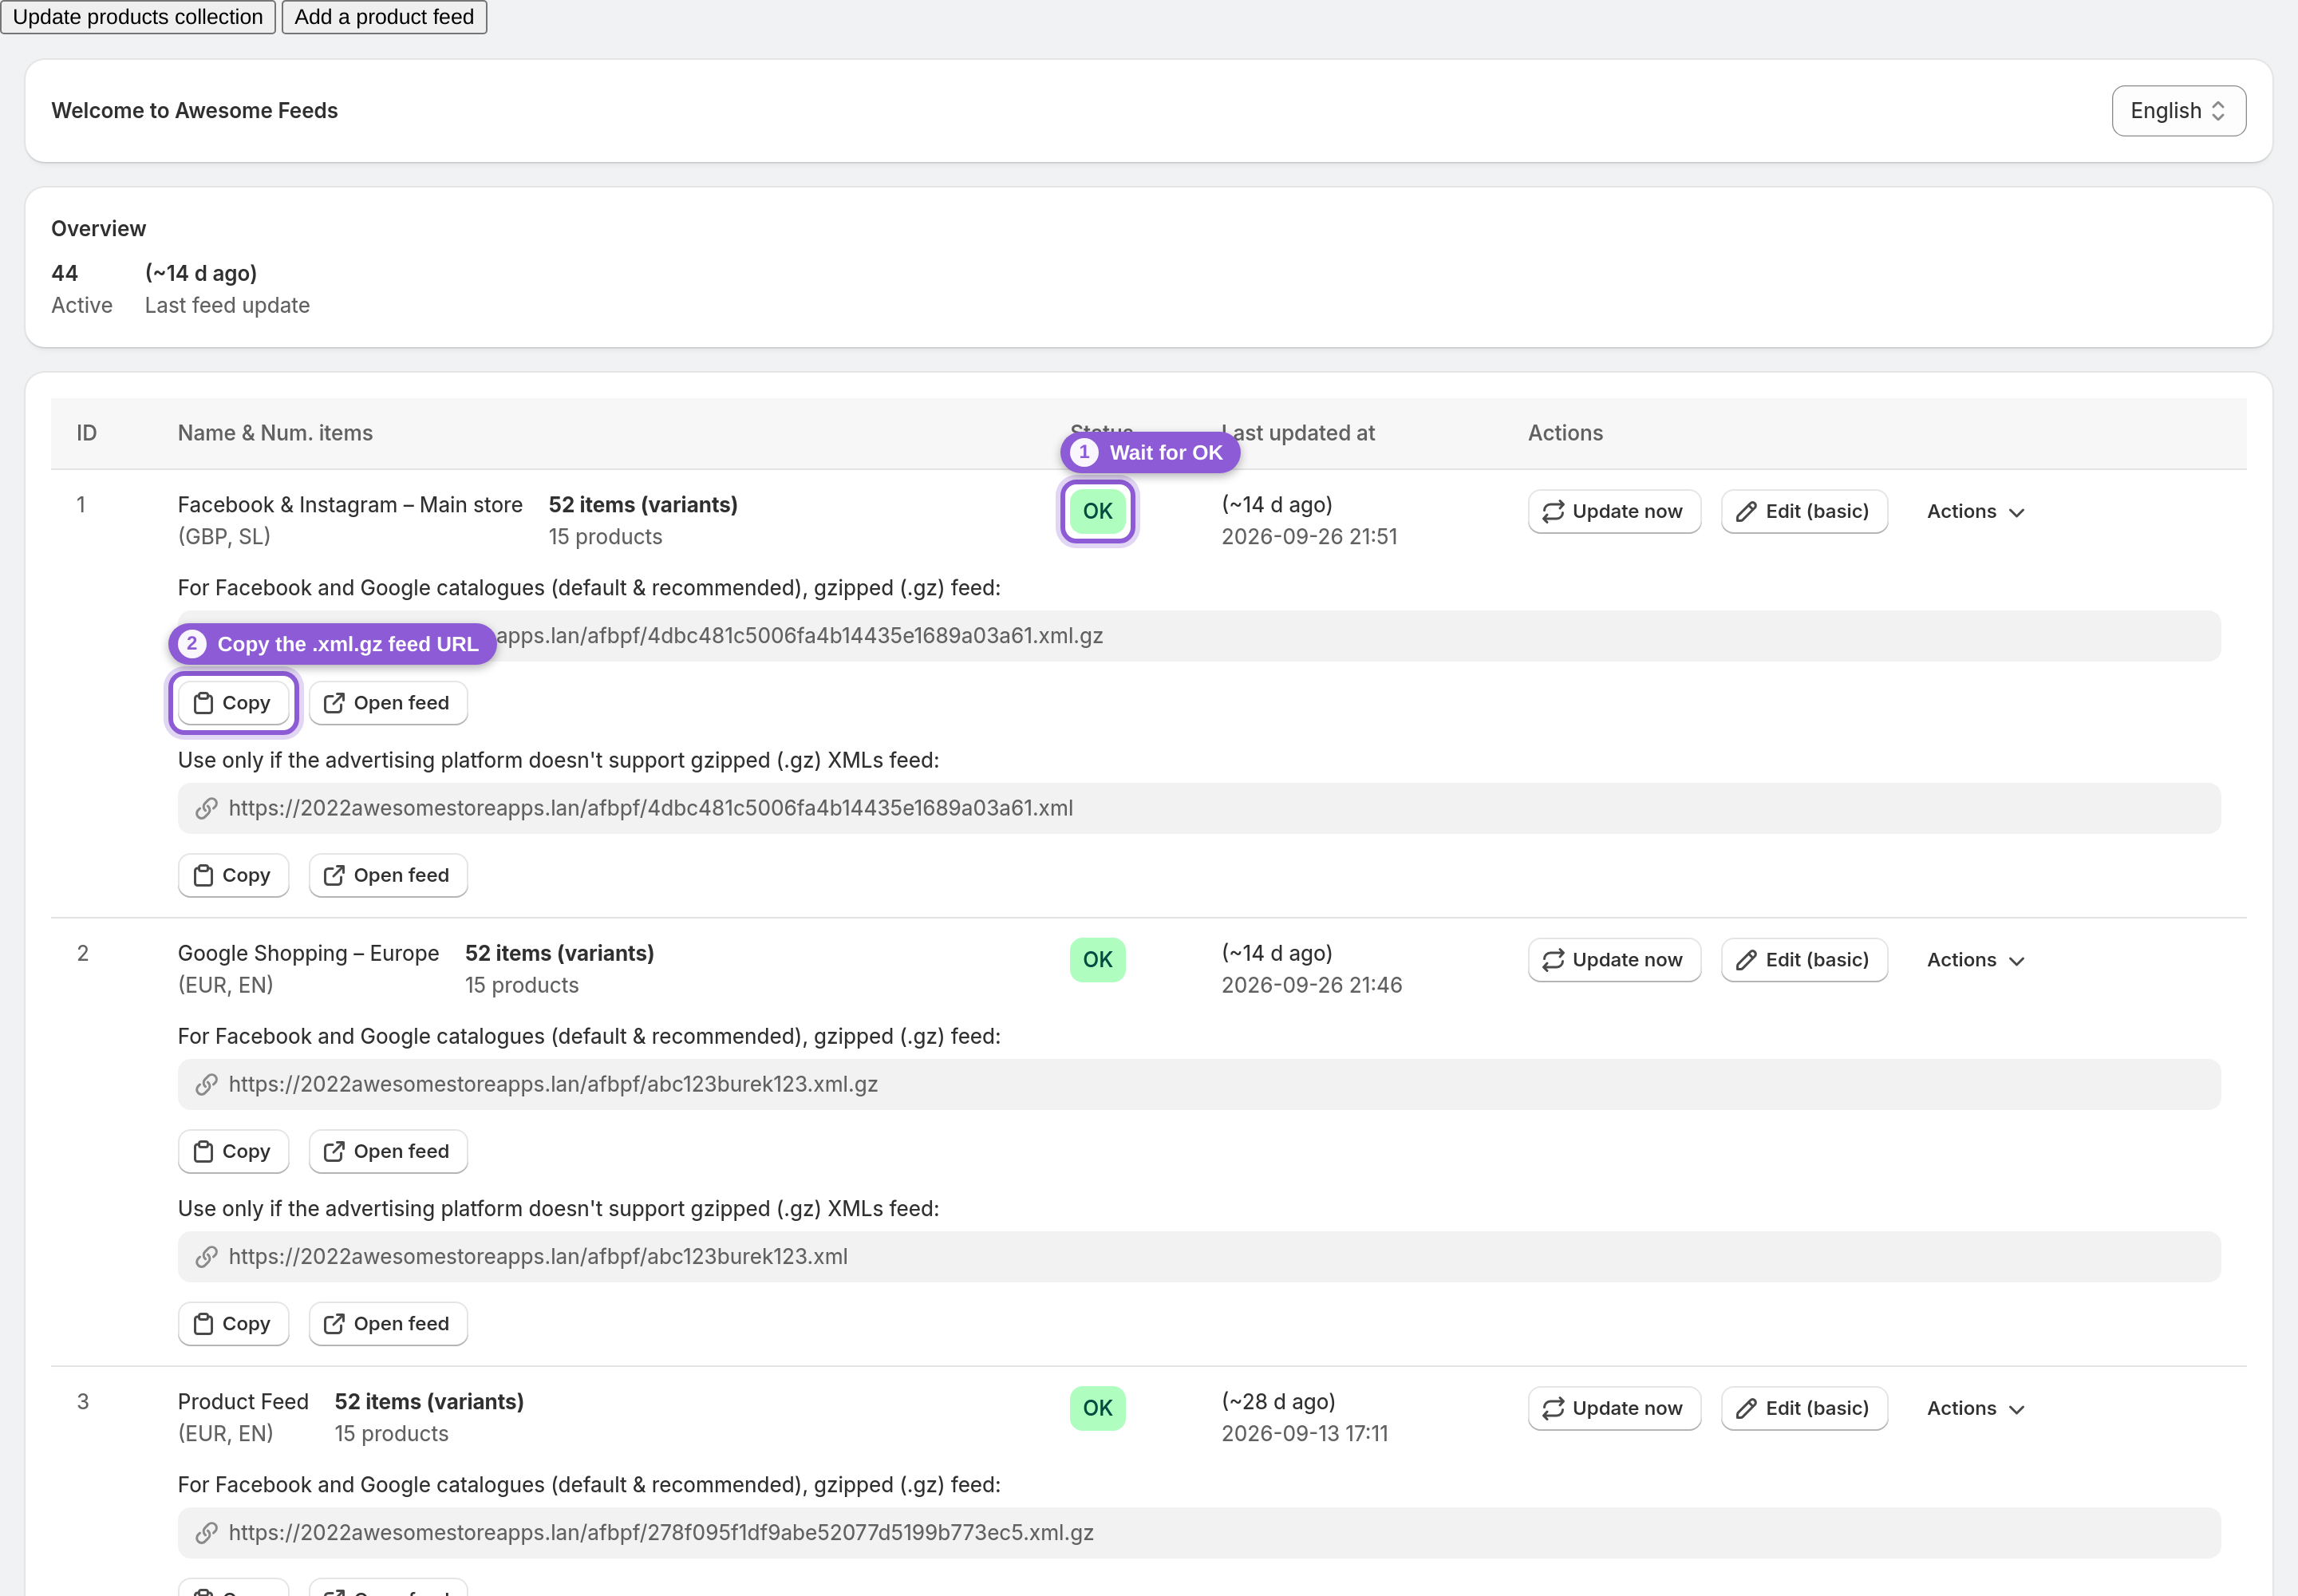
On the dashboard, wait until the feed's status badge changes from Updating, please wait to OK. A feed that shows Error (counted under Needs attention in the overview) isn't ready for Meta yet. One common cause is a feed with more products than your plan allows per feed.
Then click Copy next to the feed URL in the row under the feed. Use the gzipped .xml.gz URL, which the dashboard marks as the default and recommended feed for Facebook.
3 Create or open a catalog in Commerce Manager
Open Meta Commerce Manager. If you already have a catalog for your store, open it. Otherwise create a new catalog for your online products. Don't connect it to a partner platform: your items will come from the feed URL.
Use one catalog per store. Country and language versions are added to the same catalog later as extra feeds, not as separate catalogs.
4 Add the feed URL as a scheduled data source
In the catalog, open the Catalogue tab and go to Data sources, click + Add and select Data file. Then:
• Below Which platform is your file formatted for?, select Google Merchant Centre (GMC): Awesome Feeds builds Google-format XML.
• Choose Use a URL or Google Sheets and paste the URL you copied in step 2.
Awesome Feeds feed URLs don't need a login, so leave any username and password fields empty.
5 Set how often Meta fetches the feed
Daily is a good default for the schedule. Awesome Feeds keeps rebuilding the file on its own whenever your catalog changes, and Meta only sees those changes when it fetches the URL. So Meta's schedule decides how quickly updates reach your catalog.
In the pop-up, give the data feed a clear name (for example "Shopify main feed"), select the default currency, choose an hourly, daily or weekly schedule and click Upload. Meta then runs the first import.
6 Check the import and fix errors
When the first upload finishes, open the data source to see how many items were imported and whether Meta reported errors or warnings. Open a few items on the Products tab and compare the price, availability, image and link with your store.
Most problems are fixed in the app and then picked up by Meta on its next fetch. If the item count is lower than you expected, check the feed's collections, tag exclusions and variant filters. If the feed itself has stopped updating, work through why your feed isn't updating.
7 Use the catalog in your ads
The catalog is now ready for Facebook and Instagram. Awesome Feeds only builds feeds. It does not create or run ads and it adds no pixel. You build catalog and dynamic product ad campaigns yourself in Meta Ads Manager, using this catalog.
Want ads for only part of the catalog? Build product sets in Commerce Manager by filtering on the feed's internal labels, which carry your Shopify collection IDs. Selling in more than one country or language? Add country or language feeds on top of this main feed.
Frequently asked questions
How do I add a product feed to my Facebook catalog?
In Meta Commerce Manager, open your catalog, go to Data sources, click + Add and select Data file. Choose Google Merchant Centre (GMC) as the file format, paste the feed URL from Awesome Feeds and choose how often Meta fetches it. Meta imports the items and fetches the URL again on that schedule.
Do I need to connect Awesome Feeds to my Facebook account?
No. There is no API connection to Meta. The app publishes a feed URL, and Meta fetches it on the schedule you set in Commerce Manager. All you share with Meta is the URL.
Which feed URL should I use, .xml or .xml.gz?
Both contain the same Google-format XML. The gzipped .xml.gz version is compressed, so it is a smaller download for Meta. The plain .xml version is also fine.
How often will my Facebook catalog update?
Awesome Feeds rebuilds your feed automatically after product, price, inventory or collection changes. Bigger feeds wait longer between rebuilds. Meta only picks up changes when it fetches the URL, so the schedule you choose in Commerce Manager decides how often your catalog updates. Daily is a common choice.
Can I use the same feed for Instagram?
Yes. Facebook and Instagram use the same Meta catalog, so the feed you add in Commerce Manager serves both. You don't need a separate Instagram feed.
Does Awesome Feeds create my Facebook ads?
No. The app builds and updates your product feed only, and it adds no pixel or tracking. You create catalog and dynamic product ad campaigns yourself in Meta Ads Manager, using the catalog your feed fills.